You’ll be a legend in your child’s mind if you surprise them with a fully-formed, beautiful-looking dinosaur cake. If your kids love dinosaurs, making a 3D dinosaur birthday cake is a great way to surprise them at their birthday while saving a bit of money at the same time by doing it yourself.
Ingredients
For a Basic Cake
For a Basic Buttercream Icing
-
2 cups salted butter
-
6 teaspoons vanilla extract
-
8 cups powdered sugar
-
8 tablespoons whole milk or heavy cream
-
4 teaspoons meringue powder (optional
-
Green and Blue food dye
For Decorations
-
Rolled fondant; look for multi-colored fondant at a craft store.
-
Cinnamon red hot candies for the eyes
-
Candy corn for the tail spikes
-
Chocolate chips for toenails
-
Toasted coconut for the prehistoric grass
Part 1: Making the Body
1) Mix your cake batter. Cakes made from scratch will be denser and stronger than a cake mix.
Using the ingredients list above, combine sugar and butter, then beat in the eggs and vanilla. Mix flour and baking powder together, and then combine the dry ingredients with the sugar-butter-egg mixture. Use the milk to thin out the batter.
2) Bake the cakes. Separate the batter into two greased 9″ round pans, and put them into a preheated 350 degree oven. They should take 30 to 40 minutes to bake.
3) Make Buttercream Icing while the cakes cool. Following the ingredients list above, use a hand-mixer to cream the butter with the vanilla. Slowly add the powdered sugar. Add the meringue powder for hold, and then slowly add the milk until your frosting is the desired consistency.
4) Separate the frosting into 4 parts. 2/4 should be dyed green, ¼ should be white, and ¼ should be dyed blue.
5) Allow your cakes to cool completely. If you have time, freeze the cakes before assembling the dinosaur. This will help manage the crumbly effect that occurs when you frost it.
Part 2: Assembling the Dinosaur
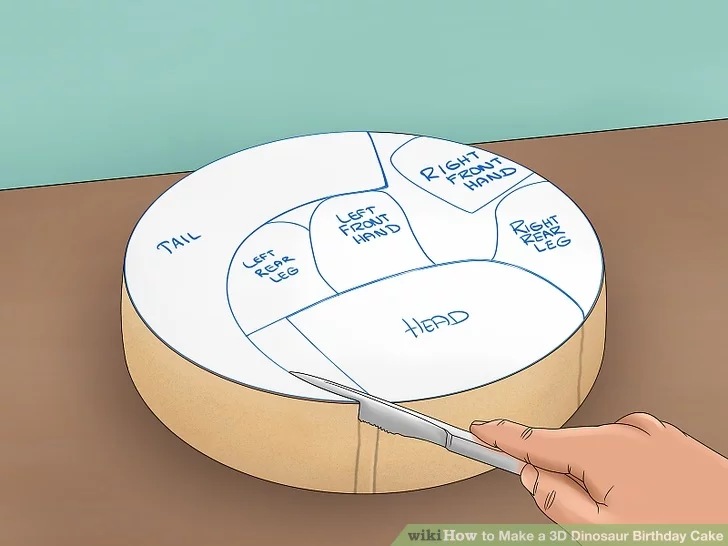
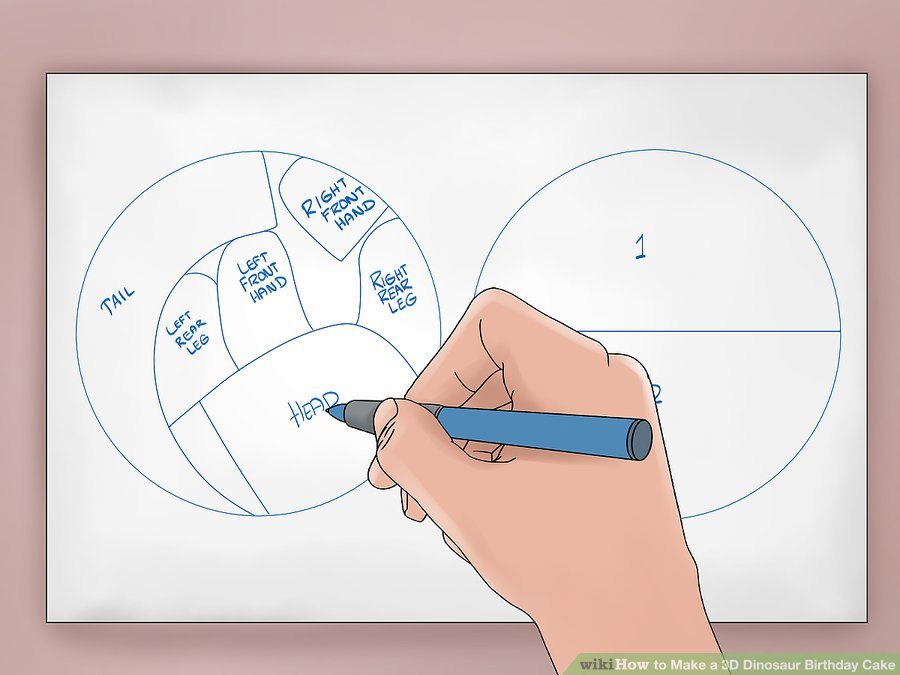
1) Make a paper template based on this image. Take a piece of light construction paper and replicate them by hand. The diameter of the circle should fit a 9″ cake.
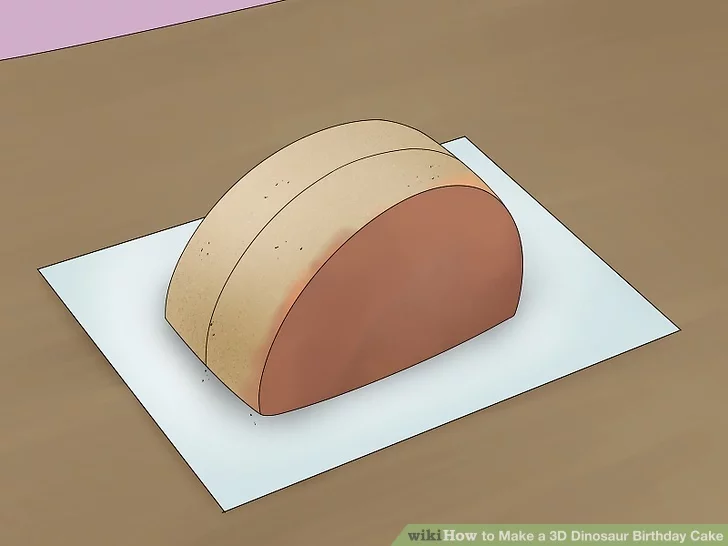
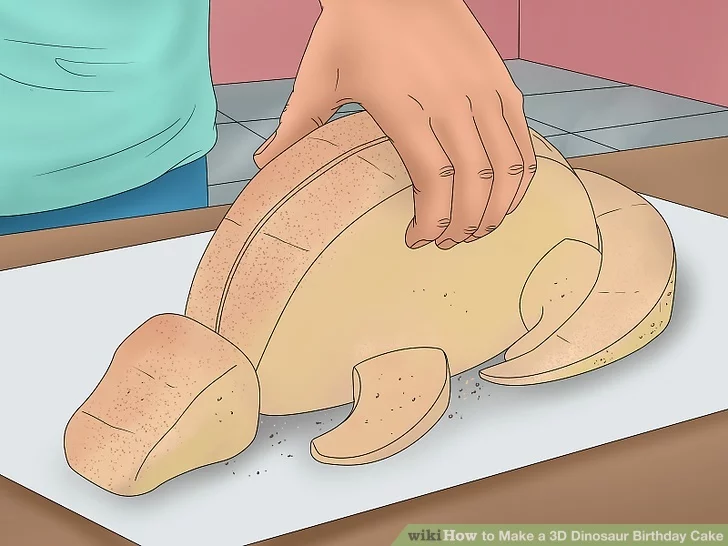
2) Cut out the body of the dinosaur. Find the center of one cake. Cut the cake in half with a serrated bread knife. Put the two halves together with cut edges aligned, and place it on your serving plate. This is the body of the dinosaur. Set it aside.
3) Cut out other body parts. Cut out the different parts of the paper template along their lines, arrange them on the cake, and carve the cake accordingly.Before you actually cut the cake, you can arrange the paper pieces to see how they look. If there are any cuts or adjustments you’d like to make, you can plan ahead now.
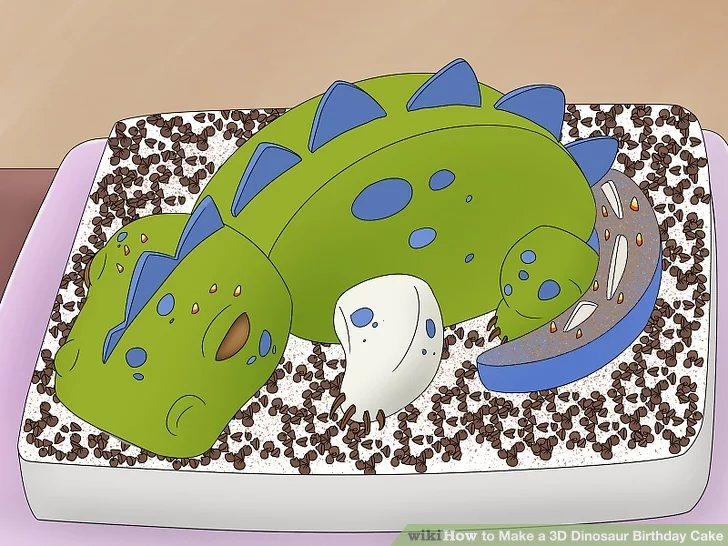
4) Assemble the dinosaur on the serving board. Look to the attached photo for help. Use white frosting to join the two body halves together. Add the appendages to the body by stacking them close.
Put the head on the body with some toothpicks (take note of where they are so that you don’t accidentally include them in a slice of cake later). Trim the corners and square edges off the feet and shoulders if you like, but the corners will not be a problem once you frost the cake.
Part 3: Finishing Touches
1) Spread a thin layer of green frosting over the cake with a spatula. This is called the crumb coat — and for good reason, as much of the crumbs pull away and get mixed up in the frosting. Use a very light hand on the cut surfaces of cake. This is where having made the cake from scratch will be of most help, as cake mixes are far more crumbly and difficult to work with.
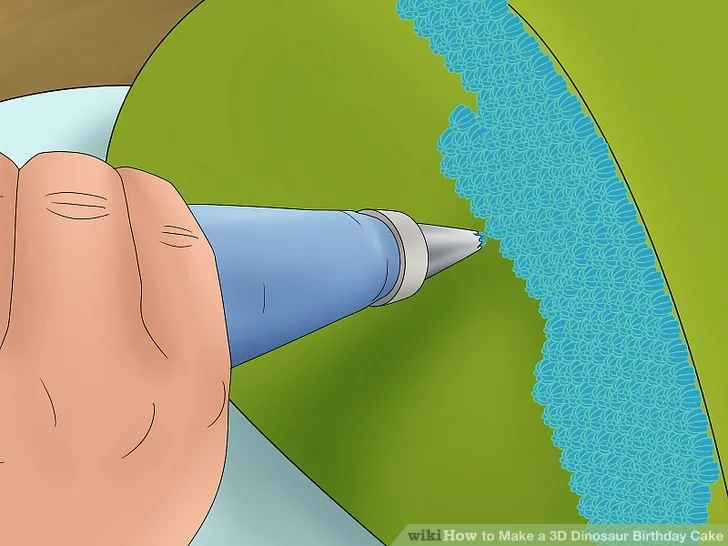
2) Add scales to the dinosaur. Use a star tip to pipe on green frosting, then add blue stars for an accents along the back and head.
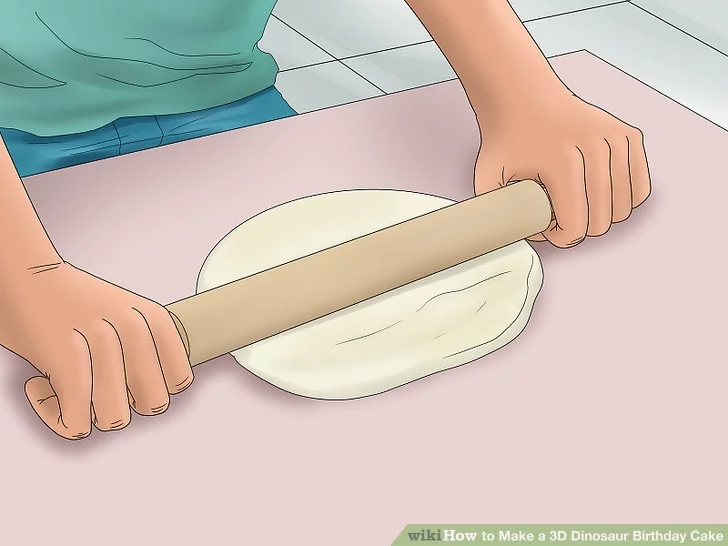
3) Roll the fondant out 1/8 inch (3mm) thick. Hand cut the fondant with a small knife to create diamond shapes for the plates on the dinosaur’s back. Detail the plates with a toothpick to give them a ribbed texture. Make as many or as few as you’d like to put on the dinosaur’s back.
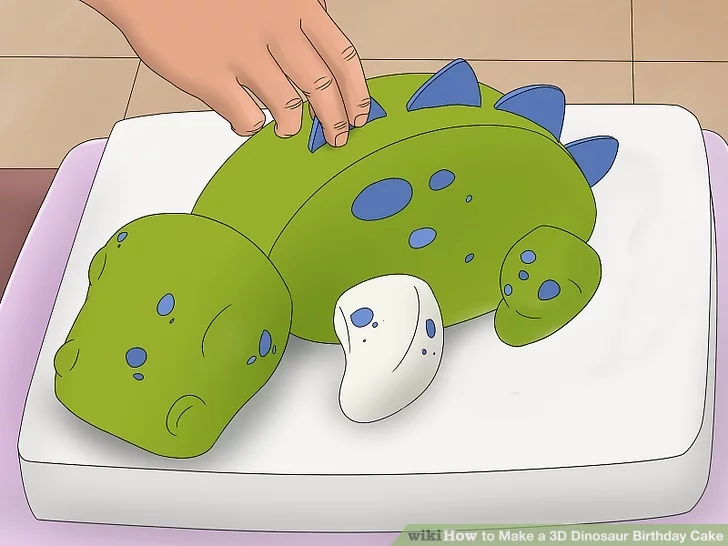
4) Add the fondant plates. Stick fondant diamond plates into the back. If the frosting does not hold the plates well, stick a toothpick into the plate then stick it into the cake.
5) Add candy for a finishing touch. Use candy corn for spikes on the tail, cinnamon candies for the eyes, and chocolate chips for the toes. You can also use any other candy you can think of to accent the tail and head.
6) Decorate the cake board. You can use green icing to pipe grass onto the cake board for your herbivore dino to graze on. Or, spread a layer of icing on the board and sprinkle it with toasted coconut flakes to simulate rocky terrain.Make palm trees with pirouette cookies for the trunk and pieces of parsley for the palms so it looks like your dinosaur is in a forest.
If you have them, you can use plastic dinosaur toys for fun.
Source: www.wikihow.com


Leave a comment