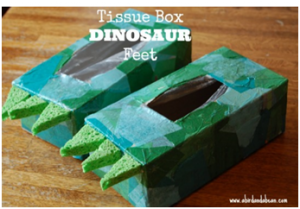
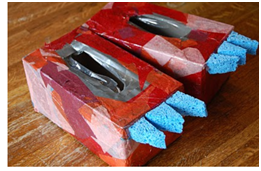
#1 Up-cycle a few old boxes and make dinosaur feet
Just picture the kids laughing and walking around in these things!
They will not take them off. If you have two or more kids, they will giggle and chase each other around. How cute is that!!! Do it with your kids, they will love every second of it!
What you need:
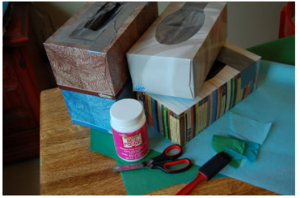
What you do:
Use the duct tape to reduce the size of the opening a little bit and to reinforce the opening as well. Have the kids paint the tissue box. Let it dry. Cut triangles out of a sponge or cardboard. Hot glue these to the box. Done. Stomp around!
#2 Paper Dinosaur Hat
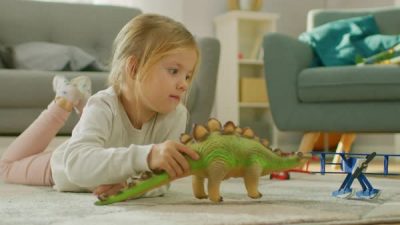
My girl loves to dress up and play pretend. I’ve found that the tiniest bit of prop, costume or accessory really encourages them, and allows them to extend their pretend play even further.
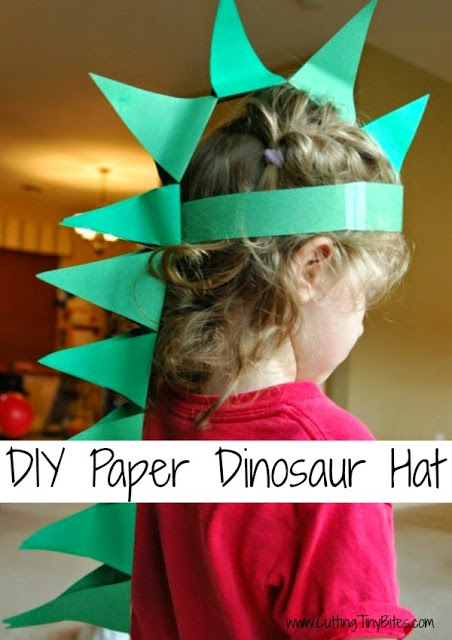
I wanted to make my daughter simple dinosaur hats, with spikes trailing down her back.
It was easy to make, and you already have everything you need. My 4-year-old made hers on her own, with just a little bit of help and guidance from me. It provided lots of cutting, gluing, and spatial reasoning practice (and it was fun).
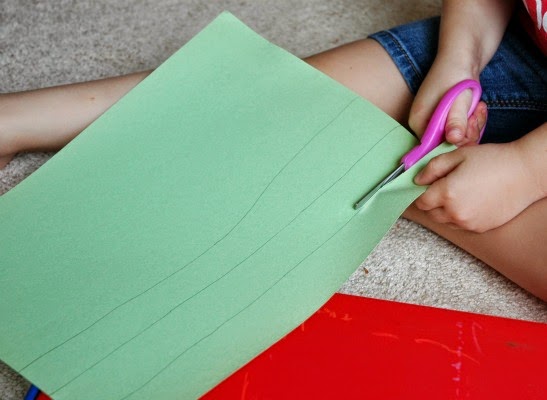
You’ll need 3 sheets of green construction paper, a glue stick, scissors, and tape.
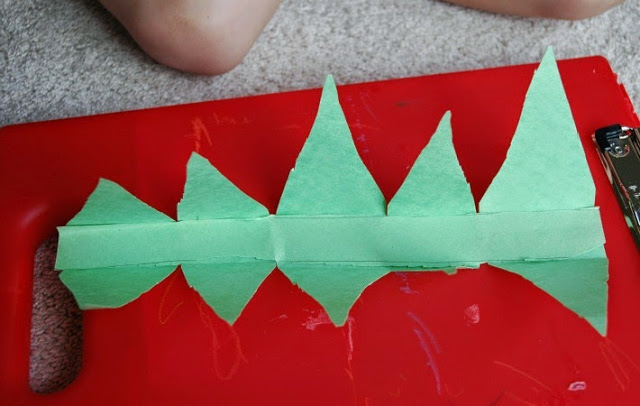
First, cut 4 strips about 1″ wide along the long side of a sheet of paper. Two of these strips will be the headband, and the other 2 will be cross pieces that you will attach your spikes to.
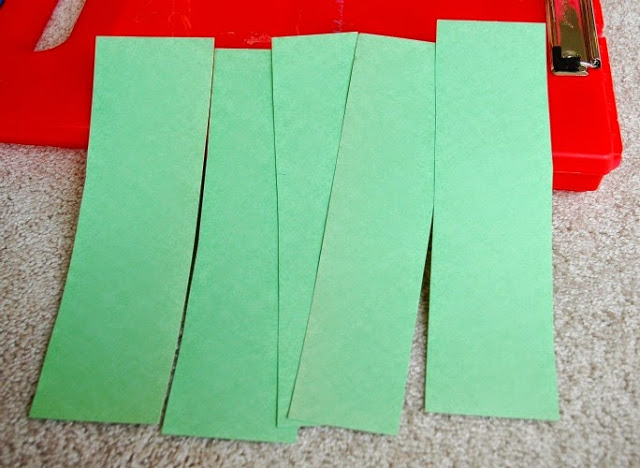
Next, take your two other sheets of paper and cut them into strips about 2″ wide along the short side of the paper. Basically, divide these sheets into 5 strips each. These will become your spikes.
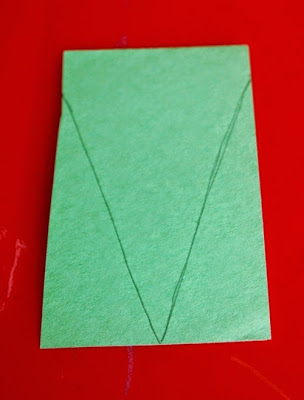
Fold each of your spikes pieces in half. You’ll want to cut these to be like a diamond, but with a ‘flat’ area in the middle. So, the point of your spike is on the ‘open’ edge of your folded piece of paper, and you’ll cut diagonally down to about 1/2″ above the folded edge. Cut out all your spikes.
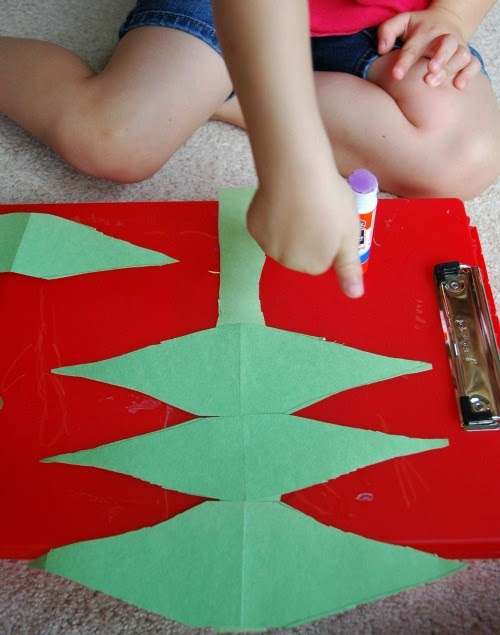
Glue the spikes, in a row, down the 2 longer narrow strips that are your cross pieces.
While the glue dries, take your two headband pieces and measure it to fit around your child’s head. We used tape to secure it in a circle. It doesn’t have to be tight, because a cross piece will go over the top of the head and help keep it on.
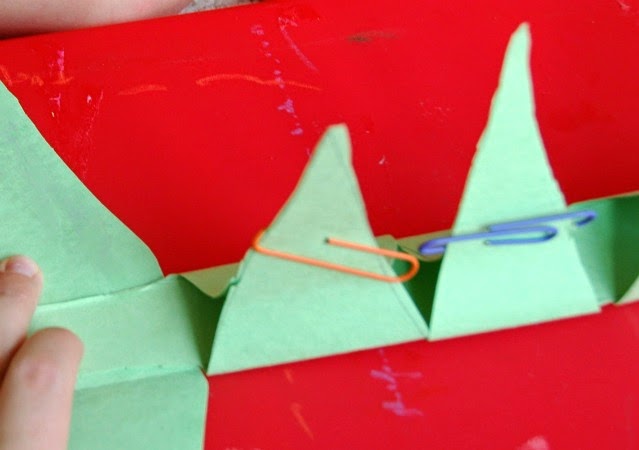
Now back to your spikes. Flip the cross piece over, so that the spikes are underneath. Fold each of the spikes up and around along the cross piece to get a good crease. Then add glue to one side and bring the two sides together to meet in the middle. Use paper clips to hold the two sides together while they dry (this was great practice for Lena– she loves paperclips, but doesn’t have much occasion to use them).
After the glue has dried, simply tape the cross pieces to the headband. One should fit nicely from the front to the back, and one should trail down below.
#3 Cardboard Dinosaur Costume
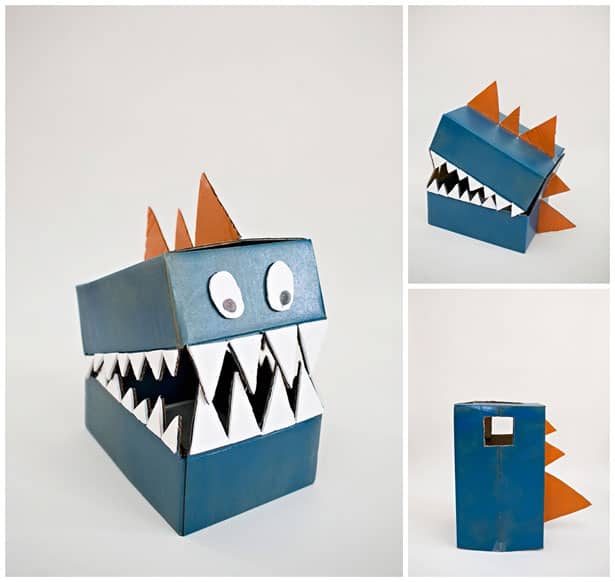
– You will need 3 cardboard boxes, two small ones (12″ x 9″ x 4″ each) for the head and one rectangular box (24″ x 12″ x 12″) for the body. You will also need scrap cardboard for the scales.
– Spray paint in the color of your choice for the scales and body. We chose blue for the body and orange for the scales.
– White foam craft board for the teeth (or use white cardstock, paint cardboard pieces white, whatever is easiest for you)
– Scissors, knife to cut through cardboard, and a hot glue gun or strong craft glue
Done! Enjoy hours of creative play!
Steps:
1. Lay out your 3 pieces of cardboard flat and spray paint each side, allowing each to dry first. Make sure of course that you are in a well ventilated area.
2. Cut out scales for the head and body from scrap cardboard. I just freehand a small and medium scale, and one extra large scale for the tail. Once you cut out one scale, you can use it as a template to trace other ones. We ended up with 5 scales on the head and 3 on the body.
3. Spray paint both sides of the scales, allow to dry.
4. Cut out your teeth on the white foam board. I liked using a foam board so I didn’t have to go through the additional step of painting the teeth. Like the scales, I drew out two sizes of teeth and used them as a template to trace the other teeth.
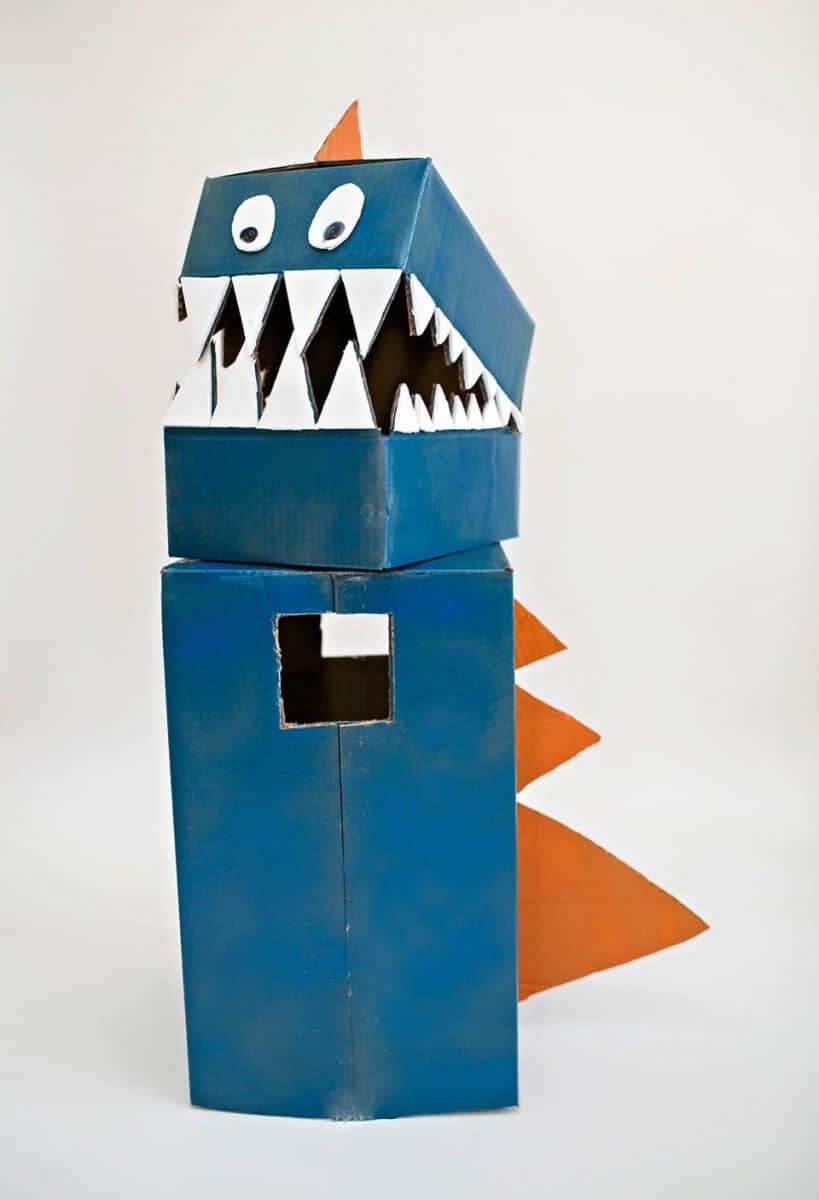
5. Once you have all the parts cut and painted, the assembly begins. For the body, cut out a neck hole and two arm holes. The length of our cardboard was a bit too long for my son so I also cut off about 8″ off the bottom, but of course that will depend on how tall your child is.
6. For the head, glue one flap down so it hinges with the other box. For the teeth, it helps to keep the box flaps down, glue the teeth on, and cut around the teeth so they are more stable.
7. Don’t forget to cut out some eyes! I just cut out two circular pieces of the white craft board and used a black marker.
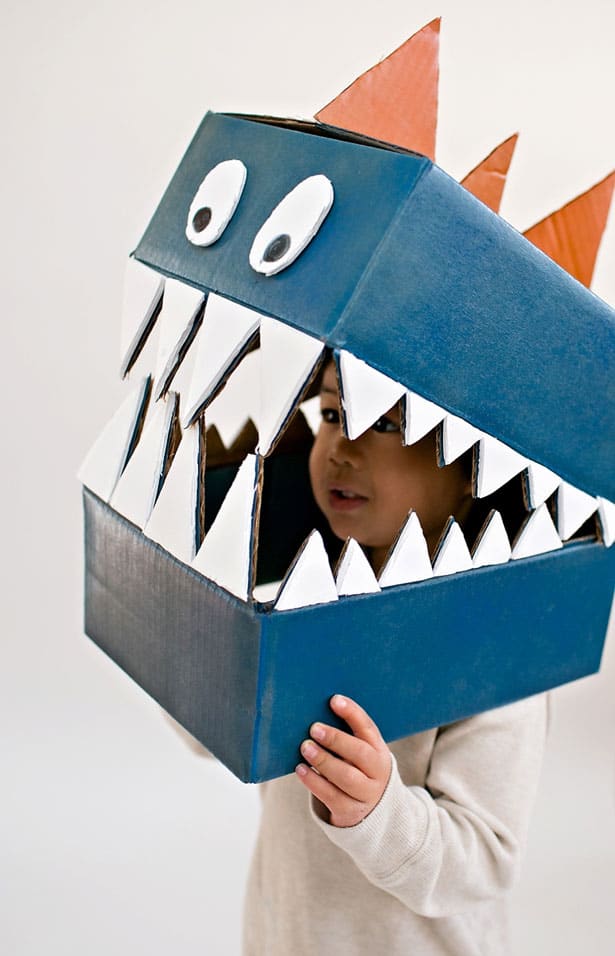
I like how the head is not attached so if it gets too heavy, it can be taken off for a bit. In case you’re wondering, you can totally see through the mouth as you’re walking. It would be awesome fun for pretend play or a dinosaur themed party too.
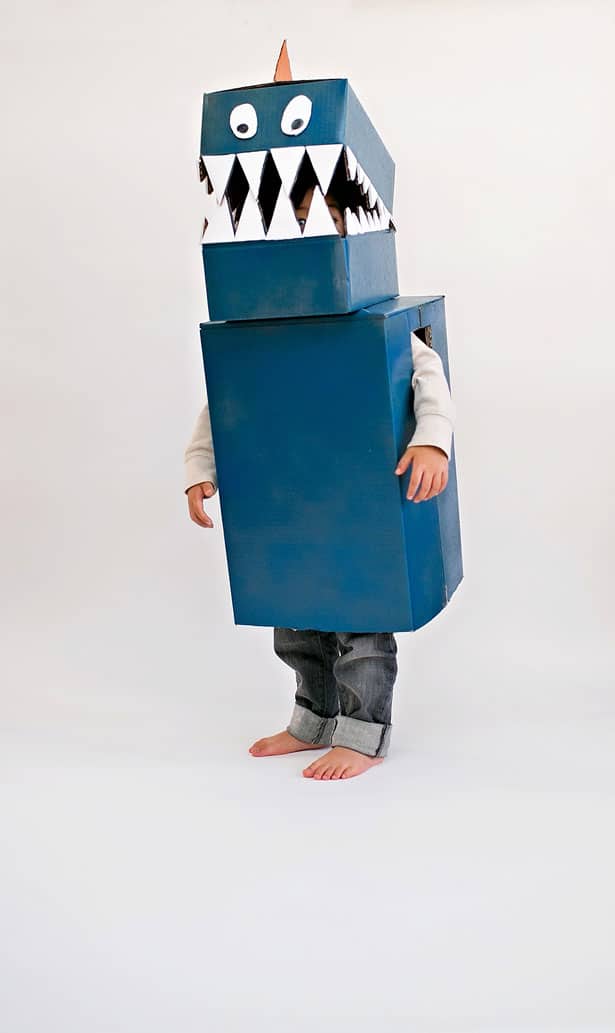
You’re done! Now take your dinosaur out for some fun.
Sources:
https://www.myjoyfilledlife.com

Leave a comment